


I’ve struggled the past few years to write anything at all, much less something about hangboarding. Partly because of how dogmatic much of the training culture has become and also because I can never really figure out if I know what I’m talking about. I also have a very difficult time condensing things into a “viral-click-bait” format, so getting this all out onto paper was a bit of a task. As long as it is, this is the abridged version. Luckily I have some great friends and peers who were able to help me wrangle this whole thing into a reasonable package. This isn’t just a list of hangboard protocols. Get ready to read. As you read, understand that I am not saying that this is “The Way”, just “A Way”.
After Chris Sharma sent “Biographie” (“Realization”), a former coach of mine told (a much younger) me, “If I could give you all of Sharma’s strength right now, you wouldn’t be able to climb 5.15, because you wouldn’t know what to do with it”. Of all the things I learned early on as a young climber, this was the most influential. Being strong is good, knowing how to use it is even better. Hangboard training can be one of the most effective supplemental training exercises for increasing strength, but it won’t make you a better climber and it can be distracting to a detrimental degree, especially for new climbers. It is easy to be seduced by supplemental strength training in general because it is easy to measure and progress is obvious. I see most people get overly drawn into supplemental strength training right around the time they hit what they think is their first “plateau”. The typical story is: “I’ve been climbing for 2-3 years and now I’ve been stuck at Vwhatever for 6 months OMG HELP, what hangboard protocol is best?” First of all, being “stuck at a grade for 3 months is NOT a “plateau”. Hell, I’ve been “climbing the same grade” for 5 years, but I’ve gotten better and stronger every single year. Climbing grades are not a 1:1 correlation for increase in performance or ability. Not by a long shot. And getting some amount of pounds stronger on the hangboard isn’t necessarily what you need to climb harder anyway. Getting stronger has significant potential to increase your performance, but it is probably not holding you back as much as you think.
Many of the issues I see with people’s hangboarding come from an overly rigid concept of which intervals or set and rep schemes are “most effective” or “optimal”, which edge size is “best”, and how much concurrent climbing they should or shouldn’t be doing. The reality is that “optimal” for a population and “optimal” for an individual person pursuing an individual goal are not necessarily the same. And what is optimum anyway? Being able to do 7:3 repeaters for some obscene number of repetitions? Or climbing 5 whatever? If you’re looking to “optimize” your finger strength, get into grip sports (it’s a thing). If you’re looking to do hard moves on rock, then you’re going to need a lot more than strong fingers. Climbing is a multi-faceted beast that isn’t tamed through the maximal development of any one thing, but through a well-rounded approach to balancing and implementing ALL things to one extent or another. “Optimum” is sending. By itself, increasing performance on a hangboard in no way guarantees any sort of actual climbing improvement. Combined with intentional climbing practice, the hangboard can be a powerful tool for increasing climbing performance.
Climbing hard means much more than raw strength. It’s a bit ironic that most of the things we make here at Tension Climbing are tools that focus mostly on building that raw strength, and here I am trying to tell you that raw strength really isn’t as important as it is made out to be. I don’t want it to seem like I am saying strength is NOT important, because it obviously is (or I wouldn’t be making training tools). The thing about climbing (and most things) is that it is ALL important. Every move, climb, or objective requires a specific combination of mental and physical capacities. This is why when climbers ask: “What’s the best way to get to ___ grade” or “the best way to get better.” or “the best way to hangboard.” The honest answer is, inevitably, “it depends”.
These days it seems that the actual utility of a hangboard has become buried under a layer of jargon and a seemingly endless stream of “new” and purportedly “better” ways to train. While it is important to support progress and new methods in the realm of exercise science, it is also important, as a climber, to discern when it is worth adopting new methodologies and when it is not. Changing your training methods every time you see a new hangboard protocol is a surefire way to definitely not get stronger. On the other hand, if you do the same thing for too long, it will eventually stop working well. As with most things, there are a multitude of effective paths to take. It is not actually so important that you get on the exact “right” path, as much as it is to stay on a path long enough to even tell where it leads.
Hangboard training is supplemental training. Anything other than climbing is supplemental training. Too often the idea of “being in a hangboard phase” seems to prompt people to put climbing completely on the back burner. Supplemental training supplements your climbing. In the same way that you can’t take a multivitamin in the morning and expect not to have to eat food all day, you can’t perform supplemental exercises/workouts and expect not to have to climb to get better. At its best, supplemental training helps build on your climbing sessions and increases your body’s resiliency to handle more intense climbing sessions. At its worst, supplemental training is distracting, uses time that would be better spent climbing, and overtaxes the ability of a climber to recover, resulting in performance reduction and possible injury.
When assessing how to utilize any sort of tool for supplemental training, ask this question: “What can this thing do for me that climbing can’t?” The answer to this question usually cuts through a lot of the fog and helps align the use of the tool with the end goal… climbing. When you ask that question about hangboarding, the answer is helpfully narrow: The hangboard creates an opportunity to train finger strength in a way that generally replicates climbing in an isolated, measured, consistent, and easily progress-able manner. It does this in a way that is superior to climbing. Climbing is more about the proper timing, coordination, and application of strength than the raw strength by itself. Hangboarding purposefully and effectively strips away the technical components of climbing allowing the climber to focus on addressing raw finger strength.
Anytime you are climbing, with few exceptions, you ARE training finger strength to some degree. So why bother training it in a more isolated situation on the hangboard also? In order to train tissue effectively it is helpful to create a situation where it is possible to consistently, incrementally, and progressively overload that tissue. Having a high degree of control over the training stimulus allows for more precise manipulation of variables, ideally, resulting in more improvement over time and less risk for injury. The hangboard is a more controlled environment for expressing finger strength than climbing. When you are climbing there are a multitude of reasons you can fail. If you fail hangboarding, there is only one answer… you aren’t strong enough.
For a beginning climber, the hangboard can be a great way to start building resilience in the tendons and ligaments of the hand and forearm while building up some foundational finger strength . . .BUT, it is important to honestly evaluate how much of this is an effective use of time or not. I am adamantly against subjecting beginning climbers to high-volume or overly regimented hangboard training plans. The first priority for all climbers, especially new ones, is climbing. Developing body awareness through structured and unstructured exploration on the wall is paramount to starting a climber on the road to long term performance. The habits and problem-solving that are developed over the first few years of dedicated climbing set the tone forever and it is extremely difficult to unlearn bad patterns and poor movement. A new climber should focus on learning to use the rest of their body to effectively remove as much load as possible from their fingers (this is essentially the core of climbing technique on the whole). Gaining too much finger strength too fast early on (and even later in a climbing career) can actually be detrimental to technique learning. Especially without the guidance of a coach or an experienced “coach-like” third party. The majority of new climbers aren’t able to leverage increases in finger strength across a range of different styles and ultimately end up out of their depth and injured. A good climber can do the move with less finger strength than a bad climber. If you’re still not convinced that hangboarding might not be that useful for a new climber . . . there’s more. A significant limitation to new climbers is the overall work capacity of their forearms. Knowing that your forearms can only handle a limited amount of work, it is especially important to use the time you have efficiently. If you’re too diminished from hangboarding, you aren’t going to have the capacity to engage in a productive climbing session, and what you really need is a productive climbing session. A productive climbing session will train your forearms and help make you a better climber, the hangboard will only train your forearms.
Grouping climbers into Beginner, Intermediate, Advanced, or Elite, is inherently problematic. It begs the question, “what is beginner, intermediate, etc.” There is no real agreed-upon answer to the question and the more you try to narrow it down, the more bottomless the pit seems. I’ll try to clear up what I mean with these labels, but ultimately there is no universal definition.
Defining these boundaries by climbing age is problematic because there are climbers who have been climbing for as long as 10+ years who I would still train like “beginners”. Ideally, you could see into the future and determine the actual genetic potential of a person and the closer they get to that potential, the closer to elite they land on the spectrum between Beginner and Elite . . . but we can’t do that. Using the idea of training age can still miss the mark, but it is a pretty good indicator. Using training age, I normally break it down into the following ranges:
BEGINNER: TRAINING AGE AND/OR CLIMBING AGE = 0-2 YEARS
INTERMEDIATE: TRAINING AGE = 2-5 YEARS
ADVANCED: TRAINING AGE = 5-10 YEARS
ELITE: TRAINING AGE = 8+ YEARS
This should be taken as only a very rough guideline. Depending on your genetics, the effectiveness of your training, and your biological age, you could be significantly outside these parameters. Consulting with an experienced coach is one of the best options for helping determine where you are on this spectrum.
Regardless of where you may or may not be on the beginner-elite spectrum, if you are a young person going through peak growth velocity (aka: puberty), You need to reduce your climbing intensity and volume. This means eliminating hangboard training (no campusing either). If you’re of that age and reading this, there is a significant chance that you’ll decide to ignore this little excerpt. Don’t.
A beginner climber can use a hangboard productively for two main purposes. Beginners who do not live in a place with easily accessible outdoor or indoor climbing options can use the hangboard at home to maintain more consistent and frequent loading throughout the week. 2-3 days a week is a good target in order to keep stimulating the tissue to adapt. If they can climb 2-3 days a week, perfect; hangboarding can get knocked down in priority. If they can only climb 1-2 days a week, then adding in a quick hangboard workout 1-2 days a week is a good idea. It doesn’t need to be highly regimented. Just take it week by week. As far as a protocol to use on that day, I usually recommend just 3-5 sets of 6 sec On : 6sec Off (body weight, reps to failure) or long duration hangs to failure (15-30sec hangs), focusing on open crimp and half crimp. More details about this are listed later on.
An intermediate to advanced climber who has been climbing for 2-5+ years purposefully and consistently should be able to start focusing on trying to make significant finger strength improvements on the hangboard and expect to have those improvements genuinely reflected in climbing performance. For an intermediate to advanced climber with a good fundamental skill foundation (which is a very loaded phrase, I know), I like to pick 1-2 training sessions every 5-10 days where the focus of the session revolves around a high-intensity hangboard workout. This doesn’t mean you have to fit a hangboard workout in every week, you don’t. This also doesn’t mean most of the time during the session is spent on the hangboard, it just means that every other component in the session is tailored to prioritize the quality of the hangboard workout. This typically looks like: a warm-up of about 10 boulder problems in preparation for max effort on edges, followed by a 25-35min hangboard workout, then 30-60min of near-limit bouldering (ideally a finger-strength focused circuit of climbs), then finishing off with a minimal amount of additional supplemental strength training exercises. For at least the first full phase, I recommend always following this session with a rest day. The type of hangboarding that best suits this day depends on the climber’s goals, but there aren’t that many decisions to be made. I either choose single heavy hangs of somewhere between 4-8 seconds, single long duration (15+ seconds) hangs to failure, or heavy repeaters of 6 seconds on : 10 seconds off for 5 repetitions. Earlier in the season, or in the “off” seasons, I recommend prioritizing the long-duration hangs or the heavy repeaters, then, as you approach a period of time where you want your finger strength to peak, start using the single heavy hangs.
Advanced to elite level climbers don’t necessarily need to do much differently on a macro scale than climbers at the intermediate to advanced level. The main difference is that the advanced to elite-level climber is going to need to more tightly control the loading, progression, and scheduling of the hangboard training in order to squeeze out additional strength improvements. They may also need increased volume and/or frequency compared to a less trained climber. This is where it becomes extremely helpful for the climber to have a developed and reliable “sense” of what they need and when. The “quality” of the hangboard session becomes more important than in the past. “Quality”, in this context refers to the climber being able to consistently hit the target objective. Half the battle is picking the right target, the other half is hitting it. For an intermediate and even an advanced climber, this ability to execute a single quality hangboard workout each time matters less than the overall quality and compliance of the training week or month on the whole. For elite climbers pushing their absolute limit, the granular aspects of each individual workout have more of an effect on the whole outcome because as the amount of potential improvement gets smaller, small details become more important. For an elite climber in a training phase that is focused on increasing finger strength, a good target is to produce, at the very least, one hangboard workout of this quality every 5-10 days if the overall climbing stimulus is high enough to not necessitate more. If for some reason the proper climbing stimulus isn’t available, 2-3 quality workouts every 10 days is a good target. Timing all the different training stimuli and recovery to create these sessions take work, they don’t just happen. At this point in a climber’s training, if they have been practicing correctly, they should at least have some idea of what they need to do to achieve those high-quality sessions. One of the most difficult things is recognizing when what you hoped was going to be one of those high-quality sessions . . . isn’t. Then adapting the plan accordingly. Sometimes the answer is: go ahead and train but alter your focus. Sometimes the answer is: go home and try again another time.
LET’S CONTINUE DOWN THE RABBIT HOLE . . .
As was discussed earlier, because of what a hangboard does best, its most effective use is for developing finger strength. You can use it for other things, but it isn’t as well-suited.
To train finger strength you’re usually working with relatively high loads. So you need to be warmed up enough, but not so depleted that you can’t handle the appropriate load. Leaving hangboarding for the end of your session is not usually a good idea. A thorough warm-up, but not necessarily a long one, is a good idea. For hangboard workouts at my highest loads, I make sure I climb a bit beforehand, and right as I start to feel like I can give the best efforts on my climbing projects, I go hangboard. When I’m working a bit below my max, I find that I can have very productive hangboard workouts just by warming up on the hangboard itself, doing some longer hangs and pull-ups, and eventually getting into the actual hangboard workout.
Regardless of the climber and their experience level, I like to keep hangboard workouts as short as possible (climbing . . . remember?). In order to keep the workouts short, it is important to identify the grip types that are going to give you the most benefit for your time. Use the hangboard to get “generally” strong fingers and the system board/tension board/bouldering to get “specifically” strong. When you look at it this way, it is pretty easy to narrow down your hangboarding grip types:
- Strength on slopers is not so much about pure forearm flexion as it is about body positioning and shoulder/core strength. Slopers are better trained by climbing on slopers, but if there are no other options and you feel you must, they can be trained (to some degree) on a hangboard.
- Pockets are super-specific and only train a few fingers at a time. Unless you are preparing for strenuous pocket climbing, I don’t find them to be a good use of hangboard time. I find climbing on pockets to be much more effective, but these days it can be very hard to find pockets in a gym setting, so for most, the hangboard becomes one of the only options.
- Pinches are an odd thing to train since pinch grips have a lot to do with wrist and thumb position. There are ways to train pinches by hanging, but it is typically more productive to train these with pinch blocks or by climbing.
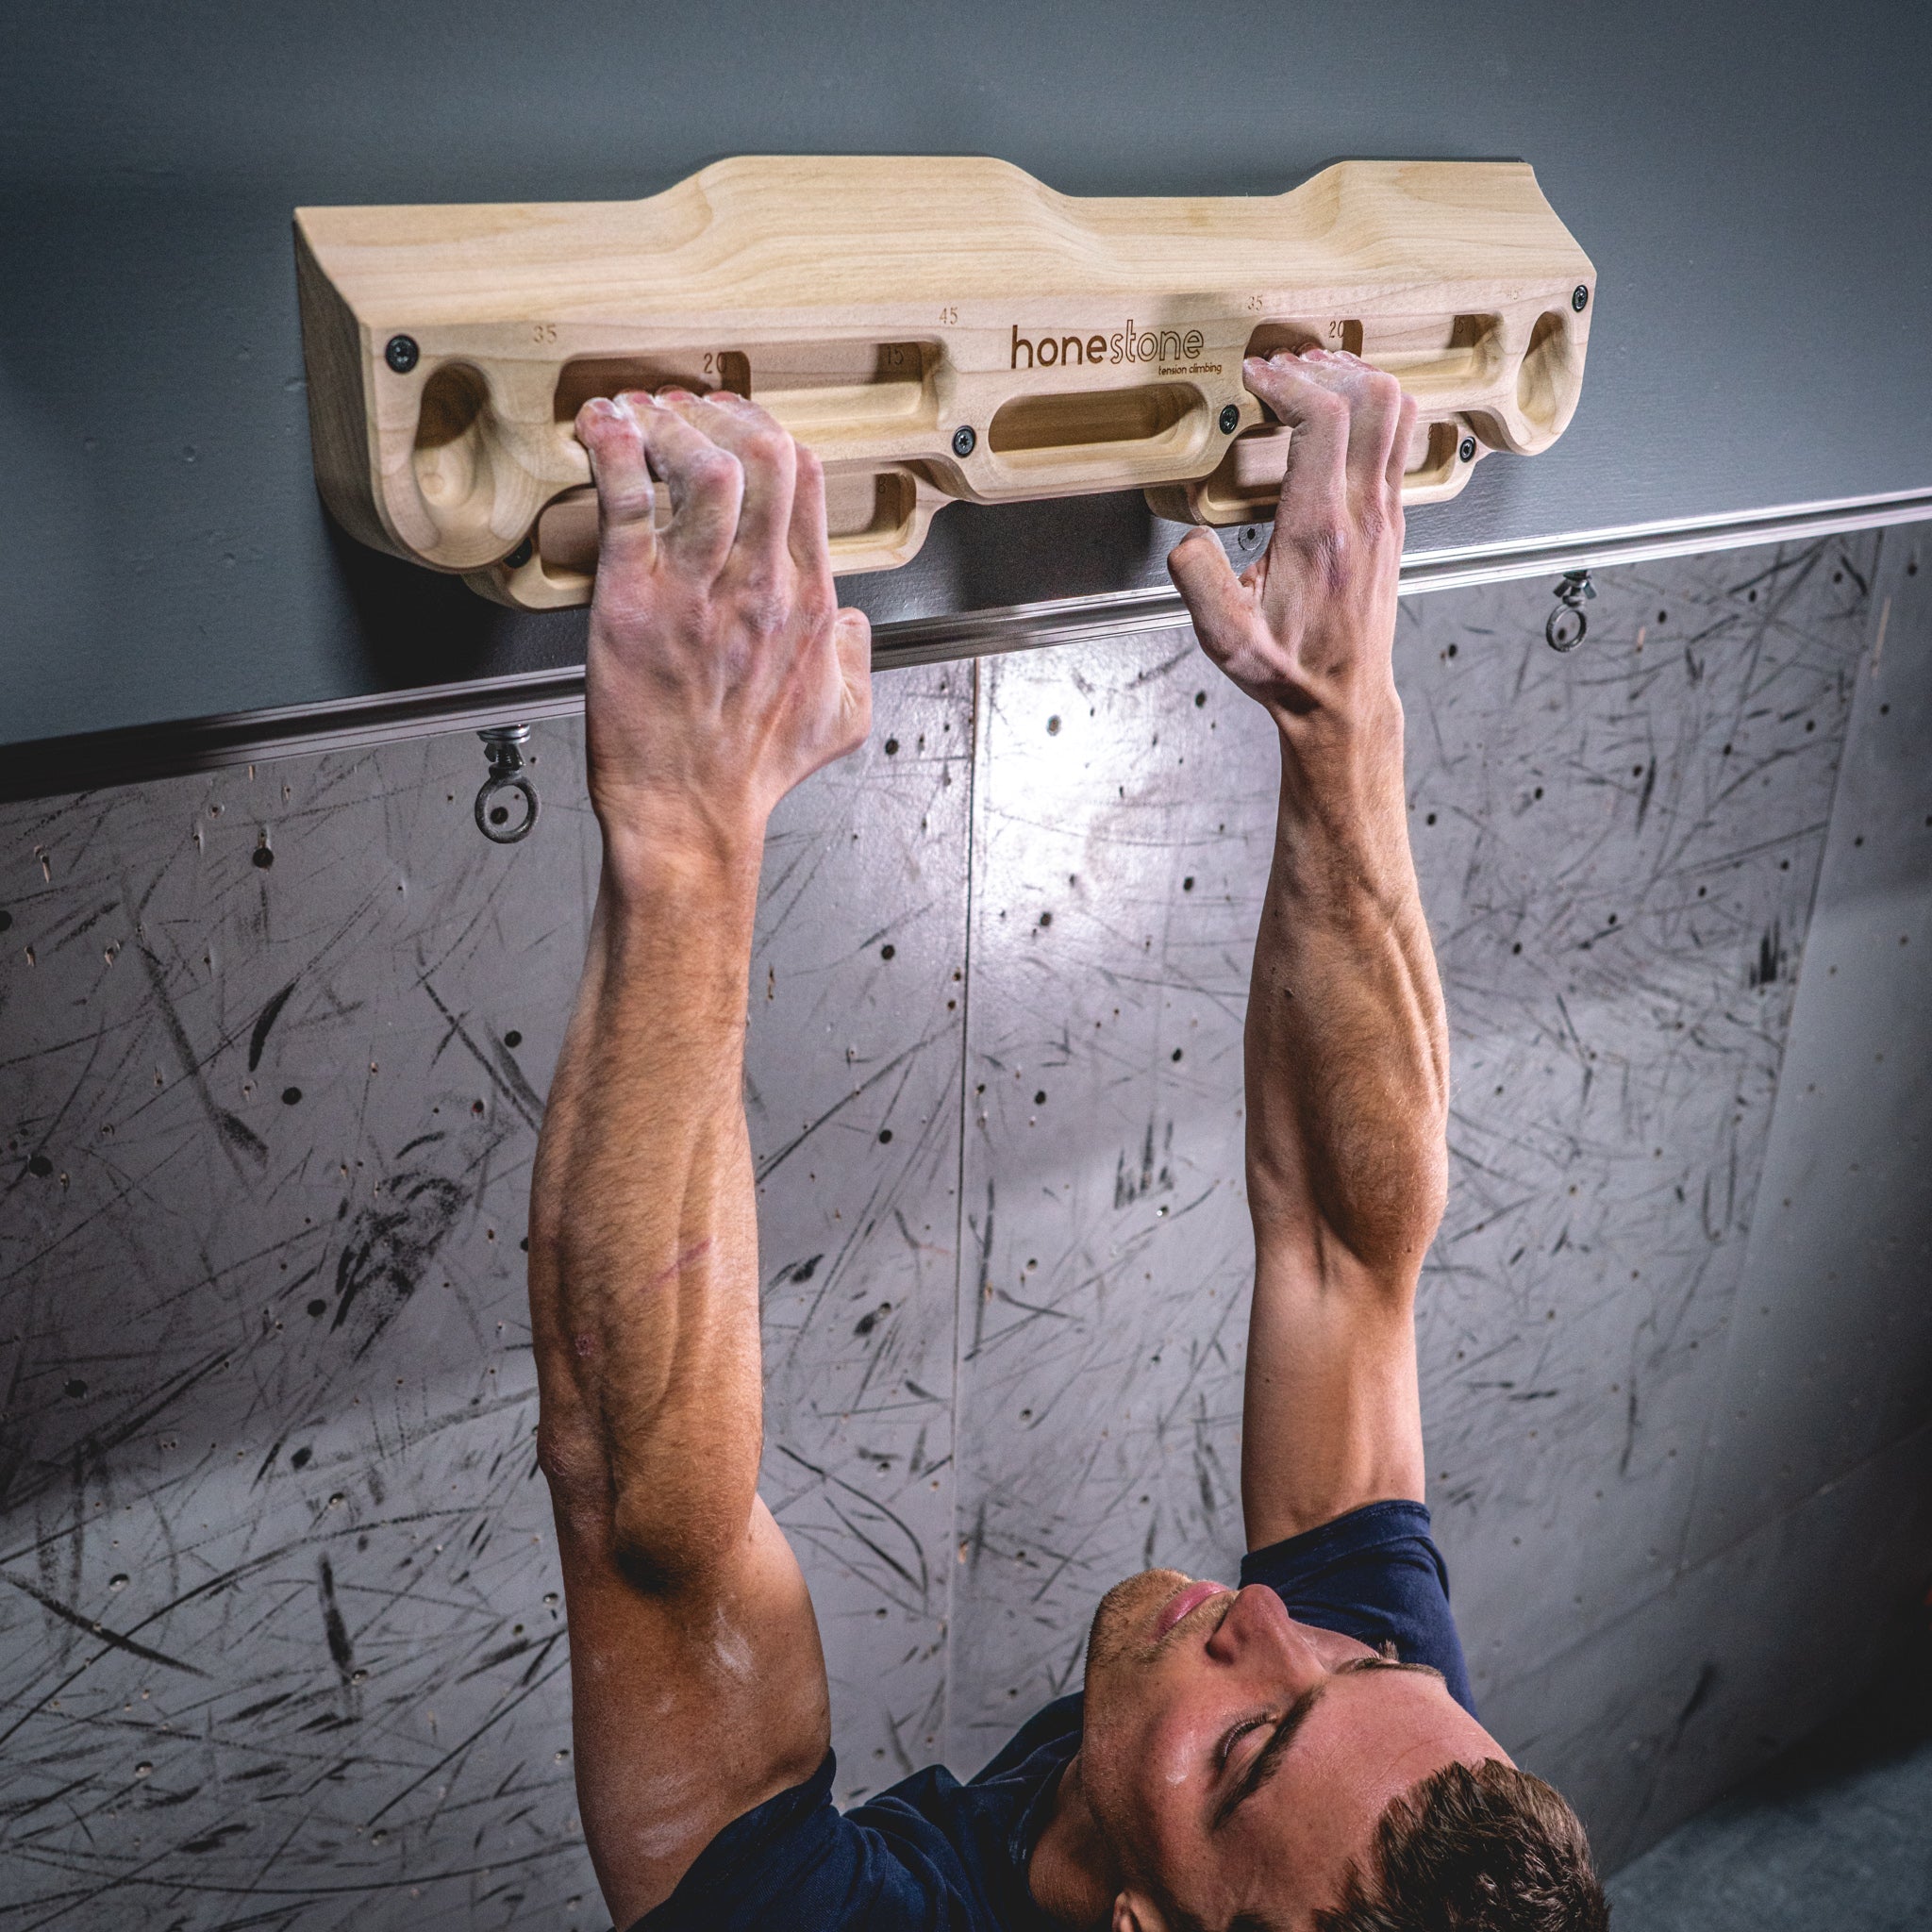
This leaves us with 4 finger edge hangs, of which there are three main types: open crimp, half crimp, full crimp.


Yes, I put full crimp in that list. If you are going to use it, you should feel comfortable training it. Don’t go crazy though, it is one of the most injury prone grip positions. I usually recommend hangboarding without the thumb wrap in favor of loading the first finger more. Then using the thumb wrap when climbing. Be extremely conservative with volume and intensity. Build up slowly and keep an eye on how your fingers feel every session. Any lingering pain or discomfort is an immediate stop sign (same goes for any grip).
A contentious issue these days is edge size. I don’t actually find the specific edge size that important at all, as long as it is consistent. For the most part, you want an edge that is about the size of your fingertip or less. It should also be as comfortable as possible while still being usable. As an edge gets smaller, it becomes more difficult to hang on to and it must inherently become “sharper” on its edge in order to remain usable. Smaller, sharper edges are more condition dependent and tax the skin more. In specific circumstances it is productive to increase the intensity by hanging smaller edges (<15mm), but for the most part, it is both pragmatic and effective to train on a larger edge (~15-20mm) and modify the load by adding or subtracting weight from your body.
There are multiple paths for adaptation that we can leverage to increase finger strength. Structural adaptations increase muscle cross-sectional area and alter the properties of the connective tissue to increase force production and transfer. Neuromuscular adaptations alter how muscle fibers and the nervous system interact, allowing the muscle to deliver a higher percentage of the strength potential it already possesses. Structural adaptations occur more slowly than neuromuscular adaptations, but increases in structural adaptation last longer and require less frequent “upkeep” than neuromuscular adaptations. Metabolic adaptations change the way the muscles store, produce, and use energy. All of these types of adaptation are important and to some extent, all are affected by hangboard training.
These different adaptations can be brought about by different loading methodologies. Connective tissue reacts productively to both high-intensity and high-density work. Neuromuscular adaptations are usually the result of using high loads at maximum effort. Working with lower loads for longer durations and/or multiple repetitions to failure/near failure helps promote an increase in muscle cross-sectional area. Metabolic adaptations happen across the spectrum, but to keep it simple: Short bouts of high-intensity loading with near-full recovery in between causes the muscle to store more energy for immediate use, increasing the capacity for power output, but fatigue happens more quickly and full recovery takes more time. Longer bouts of sub-maximal loading with more repetitions and less rest causes the muscle to fatigue more slowly and recover more quickly, though it has less capacity for short duration/high power output. These can all be good things depending on your goals, so the idea that one particular type of adaptation is inherently better than another is misguided.
When looking at how to work hangboarding into your training schedule on a large scale it is usually a good idea to focus more on structural adaptation phases throughout the year and shift focus to phases of neuromuscular and/or metabolic adaptation at strategic points to prepare for trips or other specific goals. That doesn’t mean you can/should only work on one thing at a time. You can address multiple adaptations at the same time, but the more things you try to improve, the less you can improve in each. The more you focus, the more you can improve. It is also important to keep in mind that the more experienced you are the more you have to focus on single avenues of adaptation to see significant improvements. Generally, the idea is to alternate the focus of phases between structural (building the muscle) and neuromuscular (teaching the muscle) adaptations.
The amount of time you spend in a hangboard “phase” depends on the type of adaptation you’re focusing on. A phase focusing on structural changes could last as long as 10-20 workouts, while a phase focusing on neuromuscular changes could be as short as 6-10 workouts. You’ll notice towards the end of your phase that your improvement across workouts will start to level off. This is normal. If you are still making significant improvement across workouts, you can keep going, but once you hit that area of diminishing returns… it’s time to rest and switch it up. People seem to get this confused and often think they should not climb, train, or do anything at all during these “rest” phases. This is incorrect. During a rest phase, it is important to continue to climb and give periodic high-intensity effort. The “resting” is simply reducing overall volume, frequency, and intensity to allow your body to repair and recover from the demands of the previous training phase. Actually taking 2 weeks entirely off of climbing every time you finish a training phase is counterproductive. If you were training 5 days a week during the training phase, climbing 2-3 days a week and resting 4-5 days a week would be a “rest”. That being said, taking a few longer complete rest phases per year IS beneficial and important.
How a hangboard phase looks is specific to the type of adaptation you are focusing on. For a structural phase, I usually like to perform 2-3 structural workouts for every 0-1 neuromuscular workout. When in a neuromuscular phase, I either completely eliminate the structural workouts or do 1 structural workout for every 2-3 neuromuscular workouts. When planning this out, keep in mind that different workouts require different amounts of rest to recover from in order to have another productive workout. This is really the main information you need when deciding on the actual schedule of your workouts and overall training plan. This applies to hangboarding and anything else you’re doing for training. Ideally, you train every time you are appropriately recovered from the previous training. Sometimes you want to create a cumulative fatigue across workouts, sometimes you want to fully recover between workouts, most of the time, it is a mixture. For structural adaptations, I like to build some cumulative fatigue across a few workouts, allow for a more complete recovery, then repeat. For neuromuscular adaptations, it is important to be relatively recovered before each workout. This typically means that during phases where you are focusing on structural adaptations, the overall volume of hangboarding is higher, but the load is a lower percentage of your max. It is okay to have 2-3 workouts that compound on one another, but then you need to let yourself recover more fully before the next bout of 2-3 workouts. If you notice that your hangboard numbers are getting progressively worse over 2-3 mini-cycles of 2-3 workouts, your work:recovery ratio is off balance and you need to do less work and/or increase your ability to recover. When focusing on neuromuscular adaptations, the volume of hangboarding goes way down, but the load goes way up, and the main thing you have to keep an eye on is how frequently you are actually able to have a quality hangboard session. You don’t want that frequency to drop to less than once every 10 days, every 4-6 days being a good window to shoot for. I find that it is often better to rest in preparation for a better workout than to force yourself to complete a sub-par workout just because it is on the schedule.
A quick aside about “recovery”. The 3 most important things you can do to recover are: hydrate, eat, and sleep. If you aren’t doing these three things as well as you can, stop wasting your time and/or money sitting in ice baths, strapping yourself into compression systems, shooting yourself with lasers, scraping at “adhesions”, stabbing yourself with needles, etc. In the immortal words of Samuel L. Jackson: “Go the f*ck to sleep!”. If fact, not sleeping well is one of the main reasons I’ll postpone or cancel a hangboard workout or even whole climbing session for myself. Anyway, back to hangboarding…
The whole time you are in a hangboarding phase of any type, you are also climbing! Getting stronger is essentially worthless if you aren’t also learning to apply it. Trying to just get super strong and then learn how to use it later is not a good idea. I’ve made this mistake myself on numerous occasions (…and still do). Climbing concurrently during hangboarding phases is also important because you need the stimulus that climbing provides, both the volume, and the novel/specific grip positions. Whether or not you climb and hangboard on the same day is more a value judgment than a safety judgment. Sometimes it makes sense within your schedule and sometimes it doesn’t. Yes, you should be smart about it, but you can absolutely hangboard and climb on the same day.
Not only should you be climbing, but you should be thinking about how your hangboarding and climbing stimuli are going to interact: If you’re planning on doing a neuromuscular hangboard workout tomorrow, it may not be a good idea to climb on limited finger intensive boulders today. If you just did a hard hangboard workout and are climbing afterward, it may be a good idea to make sure you are targeting some of the grip types that you weren’t just working on the hangboard (pinches, slopers, etc.). Not that there are any rules etched in stone, but the more effectively you understand how all of the different things you are doing are compounding and interacting, the more effective your training will be.
Yes, it is a lot to keep track of, but failing to do so is to be on the fast track to injury and/or underperformance. Some people have a knack for feeling this out and instinctively strike an effective balance. Most people don’t. The best way to learn how to do this is to WRITE IT DOWN. Do your best to come up with some sort of loose plan for a single training phase, then record what you do every day and adapt based on how things feel. At the end of the phase, go back over what you wrote down and see what seemed to work well and what didn’t. Make a new plan and repeat. That’s it. The only catch is, you have to actually do it for it to work, but the more you do it, the better it works.

Let’s get into some specific workouts. Which, honestly, aren’t nearly as important as understanding everything previous to this. I mention “failure” quite a bit in the protocols below, so it is probably best to clarify what I mean when I say “failure”. Failure in this context is when you can no longer maintain the proper form in regards to grip position, shoulder engagement, etc. If you’re actually pushing to the point that you explode violently off the board, you’ve gone way too far. Pushing yourself to that point isn’t going to make you any stronger, but it will put you at a higher risk for injury.
As I’ve tried to say multiple times, there are many different protocols that are effective. Listed below are some of the main methods I use and tweak as needed (the names are not creative):
6 AND 10
This is my workhorse workout. I use this more than any other throughout the year. It is mostly tailored for structural adaptations, but it exists somewhere towards the middle of the spectrum.
- 6 seconds on : 10 seconds off x 5 repetitions. ~2-3min between sets.
- I program this for 4-6 sets. Each set is dedicated to a single grip type. I usually perform half of the sets in half crimp and the other half in open crimp. If there is a special grip type that need to be trained for a certain goal (full crimp, pocket pair, 3 finger drag, etc.) I trade in two of the open crimp and/or half crimp sets to make room for two of the special grip sets.
- The goal here is to apply a load to each set so by the 5th repetition you are right up to the point of failure, but don’t actually fail. If you were theoretically try to perform a 6th repetition, you would fail.
- I like to modify the intensity in 2.5-5 pound increments. With this protocol, I like to be conservative and would rather lean towards a workout being a touch too easy rather than making it too hard and failing on or before the 5th repetition.
6:6×6+
This is a structural/metabolic workout that I use when I am the farthest away from a performance bouldering phase, so typically right after I return from a trip. I find that it helps me build the work capacity and general foundation that I need to build the rest of my phases off of. I will also use it “in-season” if I am going to be doing long boulders or bouldery sport climbs and feel like I need it.
- 6 seconds on : 6 seconds off x 6+ repetitions to form failure. 2min between sets.
- I program this for 4-6 sets. Each set is dedicated to a single grip type. I usually perform half of the sets in half crimp and the other half in open crimp. If there is a special grip type that need to be trained for a certain goal (full crimp, pocket pair, 3 finger drag, etc.) I trade in two of the open crimp and/or half crimp sets to make room for two of the special grip sets.
- This is a particularly versatile one and the goal here is to pick a rep range within which you will fail to complete a hang. Once you can hit the upper end of the rep range, you increase the load by the smallest amount that gets you back to failing at the bottom of the rep range and work back up. For number of repetitions, I like 5-8, but that’s on the low end and you could definitely go to 8-10 or 10-12 no problem, you’ll just be working with a lower load the longer you go. If you are using this in season to maintain finger strength endurance, higher rep ranges are going to be more route climbing specific and lower rep ranges are usually going to be more specific to bouldering.
- The on:off interval and the number of repetitions are very flexible. For on:off, I like 6:6, but you could push it to 7:3; 10:5; whatever. The point is to expose yourself to a cumulative fatigue that ultimately results in failure. A good rule here is to just keep the “off” time equal to or lower than the “on” time.
SINGLE HANGS
This is primarily a neuromuscular workout that also does some good things for the connective tissue. Leading up to a performance phase, I’ll program this so I don’t fail on the hangs, but leave about a 2-3 second buffer to failure. In season or immediately before a trip, I’ll actually go to the point of failure. This isn’t something I usually recommend to people until they have been climbing regularly for a few years and have also done a few cycles of “repeater” style workouts (like the ones above), but do as you will.
- 6 seconds on : 2-4 minutes off.
- I program this for 4-8 hangs. I usually perform half of the hangs in half crimp and the other half in open crimp. If there is a special grip type that need to be trained for a certain goal (full crimp, pocket pair, 3 finger drag, etc.) I trade in two of the open crimp and/or half crimp hangs to make room for two of the special grip hangs.
- 6 seconds for the hang is a flexible guideline. If you prefer 4 second or 8 seconds, whatever. As long as it is consistent and not too long, you’re good to go. I typically think of 10 seconds as the longest amount of time you’d want to hang for a workout like this, but I tend towards the 4-8 second range in favor of using a higher load.
LONG HANGS
These are something I’ve had good results with, but it seems to take a long time to respond to it so it can be difficult to schedule well. It also falls under the structural adaptation umbrella and is good for connective tissue. I try to use this similarly to the 666+ workout to build a foundation early on and away from peak performance phases. Though it is also useful alongside the single hangs as an “in-season” maintenance workout.
- 15-30 seconds on : 2-4 minutes off.
- I program this for 3-5 hangs, usually in open crimp or half crimp, but this is also a great way to build resiliency in specific grips like pocket pairs.
- Each hang is until failure. I usually choose a load that has me fail in 15-20 seconds, but you could certainly adjust the load in order to fail closer to 30 seconds.
Lastly, I’d like to address different hanging postures. The questions are usually: one-handed (unilateral) hangs vs. two-handed hangs (bilateral) -and- straight arms vs. bent arms.
When it comes to unilateral vs. bilateral hangs, The answer is normally, “which is most pragmatic?” If you are strong enough that you are adding close to your body weight on bilateral hangs, it is typically easier to perform unilateral hangs and subtract a small increment of weight rather than figure out a way to strap a large percentage of your body weight onto yourself. Biomechanically, two important things that change between bilateral and unilateral hangs are shoulder and wrist position. Hanging from one arm is more stressful on the shoulder. If you feel like you are failing on unilateral hangs because your shoulder is too weak, do bilateral hangs and sort out the shoulder weakness separately. The wrist position change between unilateral and bilateral hangs is the thing that interests me most. Wrist position and grip strength are inextricably linked. Strength differences between unilateral and bilateral hangs seem to be mostly due to this. The more experienced you get and the harder you climb, the more specific the unilateral hang position becomes. For most people it isn’t worth worrying about. Even the people for whom it might be worthwhile to worry about…it’s usually not that important. Either way, using the pragmatic argument usually sorts those populations out without having to get into the more esoteric wrist position argument.
Straight arm hangs and bent arm hangs also have wrist and shoulder components involved. Your grip is mechanically stronger with wrist extension and ulnar deviation. Hanging with bent arms allows you to leverage this position more effectively. However, you need to have the requisite strength to maintain that bent arm position in order to use it. Some people do, some people don’t. If you don’t have the strength, get it, but it is probably not a great idea to try to get it on the hangboard. Train the arm on the bar and the fingers on the hangboard. If you do have the requisite strength, hangboarding in a slightly locked-off position is a good way to maintain that strength while also effectively training finger strength. When you are hanging with bent arm(s) it is natural for your shoulder to be well engaged. However, with straight arm hangs, it is easier to allow yourself to hang passively on the shoulder joint. This is a huge no-no. If you can’t keep your shoulders active and engaged while hangboarding, you shouldn’t be hangboarding (and you should be very careful while climbing). Simple as that. Train your shoulders first. Once you have the requisite shoulder control, you can revisit the hangboard.
In closing, if you learn to think critically about how different hangboard protocols (and different training modalities in general) work and how they can complement the rest of your climbing, you create a situation where your training can adapt to changing goals and circumstances. The better you can adapt your training to changing conditions on the fly, the more effective your training will be.